Note: This is a re-post of a tutorial I wrote several years ago. Notion has improved a lot since then, and my system has changed a little (more on that soon!), but I still think this tutorial is a valuable beginner’s guide, especially if my upcoming guide on my new system is confusing to you.
Ah, the to-do list. I hate them and I love them – on the one hand they tend to grow menacingly large, but on the other hand, I get to feel productive adding things to them without having to actually do the hard work. At least, I’d say, it ensures I’ll get to it eventually. I’ve tried a bunch of methods: agendas, notebooks, a bunch of apps, but I say Notion is the new hotness for your doing-things needs!
For those who haven’t heard of Notion, it’s a relatively young productivity app that touts itself as an ‘all in one’ workspace. While it has some flaws (particularly with its slow mobile app and lack of offline functionality), I now use it for a ton of things: Notes, time tracking, managing projects, reading lists, bookmarks, exercise tracking, all of it! At first I wanted to share my entire system with you, but for now I’m going to keep it simple, and share how to use some of Notion’s most effective features, a to-do list and agenda all in one! The Notion membership is free if you have a student email – a trial version is also free, but if you use it frequently you’ll run out of your 1000 blocks eventually. If you do want to sign up, I’ll provide a referral link down below for $10 off the plan. I want that sweet sweet extended membership.
Now, each ‘block’ is essentially a tailored item inside Notion, which can be any number of things from checkboxes, dropdowns, databases, links, etc. One of Notion’s fundamental features is it’s databases, which allow you to tailor it in wonderful ways. A second excellent feature is its ‘Views’, which can present data in a variety of forms, such as a table, kanban board, or calendar, all three of which we’ll show off in this tutorial. We’ll be using both of these for our to-do list, so let’s get started from the basics!
1. Creating a new page
The first thing you are going to want to do is click the New Page button on the lower left of the screen, and select ‘Database’ – this will help us set up the fields we’ll be tracking. This is where all your data will be stored! Now, of course, you may have data you want to track that I don’t include in this tutorial, but the magic of Notion is how easy it is to tailor to your needs. I generally track a bit more data (such as time spent and what project its spent on) in my system, but for now let’s keep it simple.
2.Setting up your fields.
The database comes with a handful of pre-set fields: Name, Tags, and Files. Names and Tags we can use, and Files is fine if you plan to add attachments. The ‘Name’ field we will use as the description of our task, such as ‘Do the laundry,’ ‘Plot the downfall of man’ or ‘Get groceries’. It’s a task field and also a link to a ‘page’ inside which you can embed even more blocks (such as notes – say a shopping list – or even more databases). Tags are a ‘multi-select’ type, which means you can add more than one. Change the property type to ‘Select’ to limit it to one item – This field will be used to sort your to-do list into categories – mine are Low Priority, Medium Priority, High Priority, and Done.
Next, hit the + button on the top to add a new field, and make it a date field titled ‘Date Due’. Due dates are very useful even if the item might not actually have one, it allows it to be plotted onto the Calendar view in a very useful way, which we’ll get to later. You can also set reminders on due dates, and Notion will send you a notification a certain amount of time before (or on) the date. I always put a due date on any item in medium or high priority, and use low priority as a ‘get to it whenever’ section.
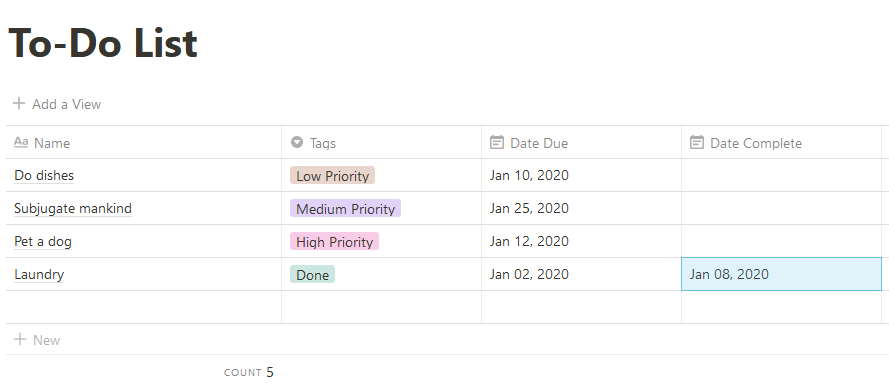
Add a second date field, this is ‘Date Complete’. Now, you don’t necessarily have to bother with this, especially if you don’t really care about archiving your to-do list, as if you scroll down the property types you’ll see that Notion also has a ‘Last Edited’ field that auto populates, which may serve your purposes just as well. I prefer to enter it manually, however, because any change to any of the values will change the Last Edited field, even if you’re, say, renaming a tag. When you’re done it should look like this (I’ve populated a few items)
3. Setting up your views:
With these fields alone you’re already good to get your to-do list started. I’m going to suggest a few extra bells and whistles shortly, but first let’s set up your views so you can get a good idea of the capability of the system! Perhaps populate a few items into it like I did, just to get a good feel for how this data converts across views. As you can see, right under the title is the ‘+ Add a View’ option which gives you a list of options. The one I use most frequently is the ‘Board’ view. This will be used to separate your tasks by priority (or whatever other criteria you chose for your Select field). The magic of views is you can have as many as you want, presenting your data in many different ways. Name it whatever you like, mine is ‘To-Do Board’. Once you’ve done that, you’ll see your items shown like this.

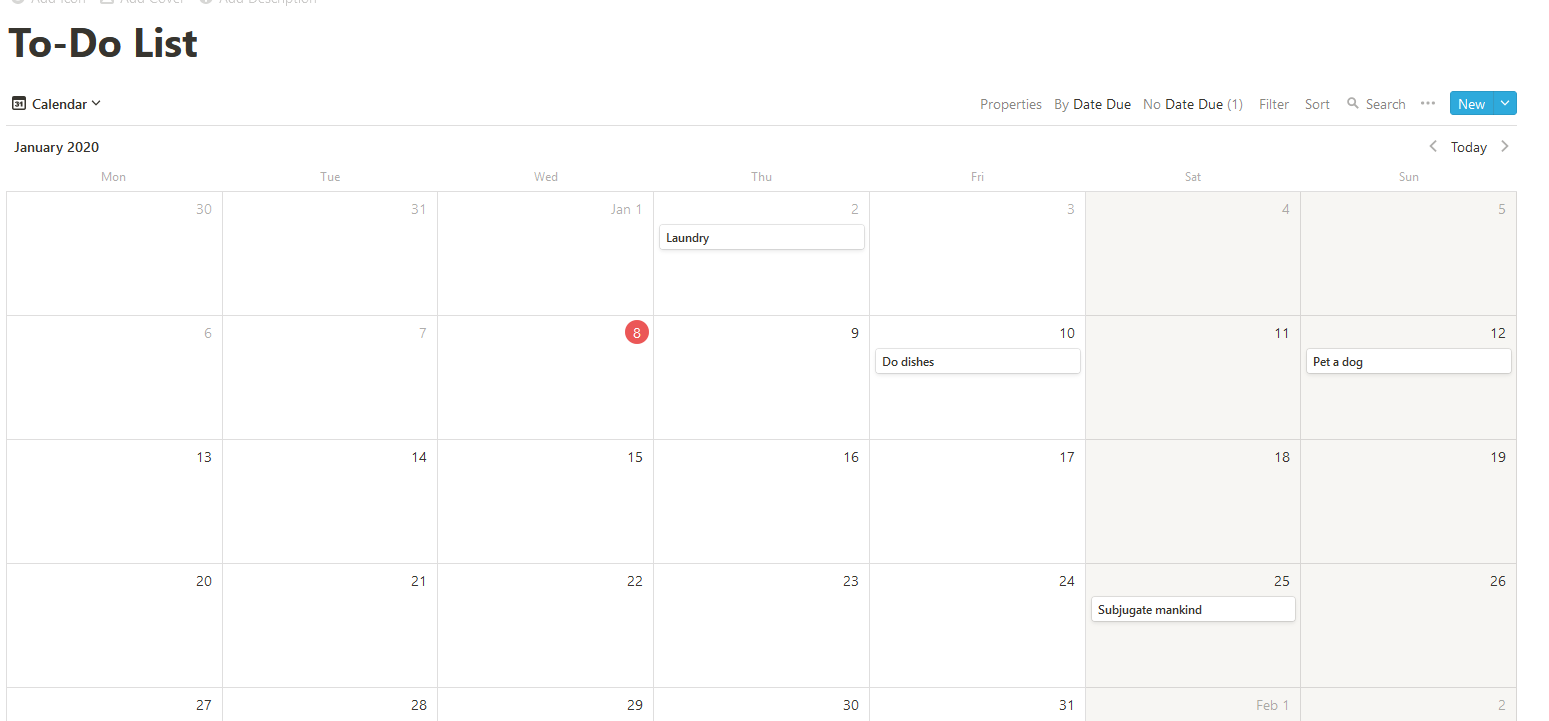
If you drag an item across to a new category, it’ll automatically change it. This is all the same data as in your database rearranged. Now check out the ‘Calendar’ view. As you can see, it’s sorted all of your properties on a calendar by ‘due’ date, giving you an agenda of your upcoming tasks!
Or perhaps you’re more a simple to-do list kind of guy.

Now, each of these views can be configured – if you look along the top bar, you’ll see ‘Properties, Filter, Sort, Search’ and ‘New’. Let’s start with properties. Properties lets you choose what fields of your table show up – so for example, if you want your to-do list to show the priority, flip priority and it will! Next is filter, which could let you, say, filter out completed tasks (such as ‘Laundry’ in my example). Sort will let you, well… Sort your data, in a variety of ways, including ‘in the next week’ to get a quick view of everything coming due this week, or alphabetical, or by priority!
4. New Pages & Templates
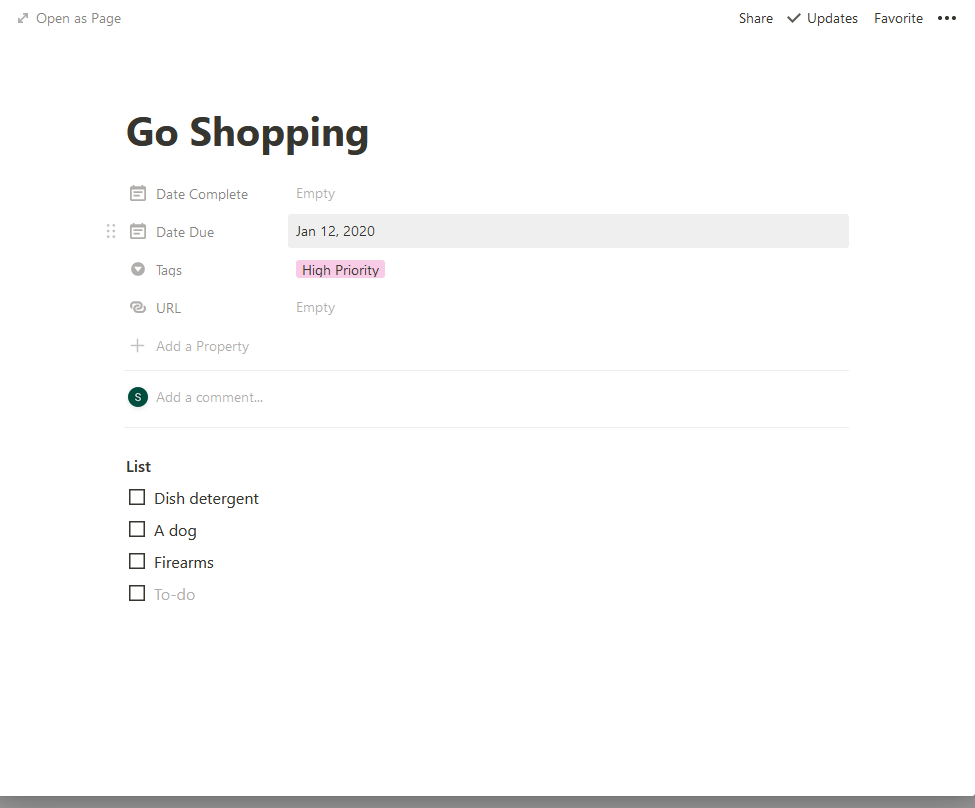
Let’s check out the ‘New’ dropdown menu while we’re at the top bar. This creates a new entry in your database, which is in itself a page. Now, if you look at the text area underneath ‘Add a comment’, and type /, you’ll see a host of options appear with a variety of ‘blocks’ – like headings, checkboxes, images, bookmarks, and even more databases. You’ll also see the ‘Add a property’ button above where you can add fields to your database on the fly. URL, for example, could save a link (which when paired with the Notion web-clipper is a powerful tool for an online reading or bookmark list!) Or, perhaps, you could add additional tags, just as tags for ‘Work’, ‘School’, or any other category you’d want to keep track of – you can filter on them, to have, for example, a to-do list just for work, just for one class, or by activity like fitness or reading.
Now, if you select the little arrow next to ‘New’ you’ll be presented with the option to make a template. Perhaps your grocery list is similar every time, make a template of it! Then when you go to that drop down arrow, you’ll see a list of your templates.
So there you have it. With maybe 10-15 minutes of setup, you’ve already got a super diverse way of interacting with your to-do list. There’s other cool things Notion can do, like relate databases to one another and perform calculations like a sum of your time spent on something, if you track it. I’m going to work on another guide soon that will show off a system I’ve been using for keeping track of projects and goals, and how you can link it to your to-do list using relationships. Let me just show you a little bit extra, though, with some of Notion’s cool more advanced features handling relationships and formulas.
5. Adding A Minutes Fields to your To-Do list
To show you thr trick for relating databases, I’ll start by adding a ‘Minutes’ column to my To-Do list. I find quantifying things by time spent is really useful for keeping track of how much time I actually spend working on things, which also helps me estimate how long it’ll take similar things in the future, and assess roughly how much I get down. Obviously time is not necessarily a fully accurate measure of productivity – you might get a lot done in ten minutes and very little done in an hour – but it’s easy to measure. I usually measure in minutes, and use a formula to convert it into hours, so I’m not bothered converting my minutes into fractions of an hour if I did something that didn’t take long.

So now you have a minutes property, and if you did something and were interested in keeping track of time spent, you could enter it at the same time you’re checking off items you’ve done, to whatever degree of precision you care for.
6. Setting Up a Related Database
Now, let’s set up a projects and goals database, which we’ll be relating it to. My usual philosophy is that any medium to long term tasks that I want to make sure I remember – namely anything that’ll probably take me more than a few hour’s work – can go here. Create a new page as a table, and add some fields for what you might want to know about your project or goal. Here’s a simple mockup of a project list, what information you capture is up to you.

Now as you know, you can add all sorts of information into each of these subprojects’ containers, including itineraries, breakdowns of your goals, notes, etc. But say you want to track your time spent training for your Kangaroo boxing tournament coming up. Well, we have a to-do list that we track time in, why not use that? Add another property to your projects list and select ‘Relation’, then click on your to-do list. You’ll see column represented with a little arrow. Now if you go back to your to-do list, you’ll see the same thing – this is your join field between the two databases. Now, say you spent 90 minutes today training in kangaroo kickboxing – when you create the item, you can log that time, and select a project.

Now both databases have a field connecting one another. So let’s say you want to know a sum of all of your time spent training – go to your project and add a ‘Rollup’ property. This lets you pull across data from a related table. Click inside one of the rollup cells and select ‘select an existing relation’ and then select the ‘related items’ column you just linked, select ‘Minutes’ as your property, and select ‘Sum’ as your calculate field. Now, as you can see, it has summed the hours you spent training.

If you added another 90 minute session through your to-do list, it’d then be 180 minutes.
Now, that’s just one thing you can do with relationships and rollups, you could come up with all sorts of other creative applications. You could just as easily connect them the other way, and have a rollup carrying over the tags, for example, into your to-do list.
7. Formulas
Ok, one last feature is the Formula property. Let’s say you don’t want to see your time spent Kangaroo kickboxing as 90 minutes, but instead as 1.5 hours. This can be done with a formula property. Create it, and then enter ‘prop(“Time Spent”) / 60’, this will, as is probably obvious, divide the sum of your minutes spent by 60 and therefore give you it in hours. Formulae can do all sorts of things based on all sorts of conditions, I encourage you to play with them. They can be frustrating, especially if the logic of trying to talk to a computer isn’t intuitive for you (I struggle a lot with it), but it’s also oddly satisfying to come up with an elegant formula that does what you want it to.